
Last month, we finished our walking bridge at Dream Garden. I stood back, looked at the sunflower field, and thought: “Something’s missing.”
My team felt it too. The space needed a focal point—something people would actually want to photograph. After tossing around a few ideas, someone said, “What about a heart shape?”
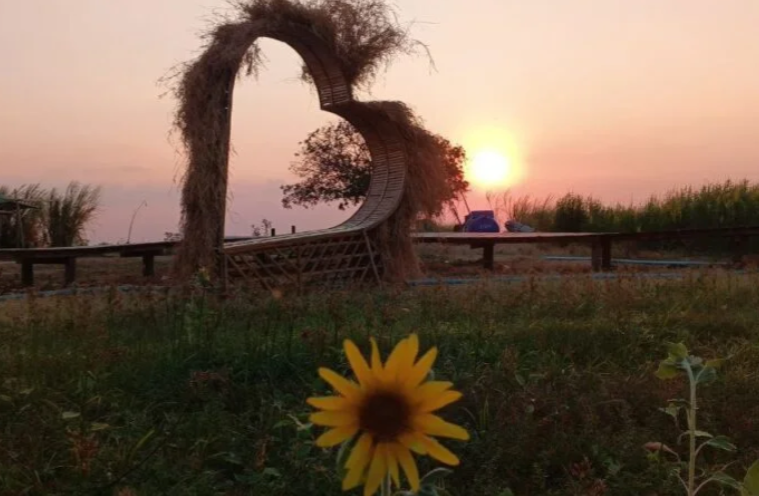
That was it. Three days later, we had a 3-meter (approx 10 feet) heart gate standing in the middle of our sunflower field. Total cost? $37.50.
People now ask me all the time: “Did you hire an architect?” or “How much did that cost to build?”
Nope. Just bamboo, steel bars, and three sweaty afternoons. Here’s exactly how we did it.
Why We Built a Heart-Shaped Gate (And Why You Should Too)
We needed an Instagram photo spot—let’s be honest. But we also wanted something that felt natural, not like we’d dropped a concrete monument in the middle of a flower field.
A heart shape works because:
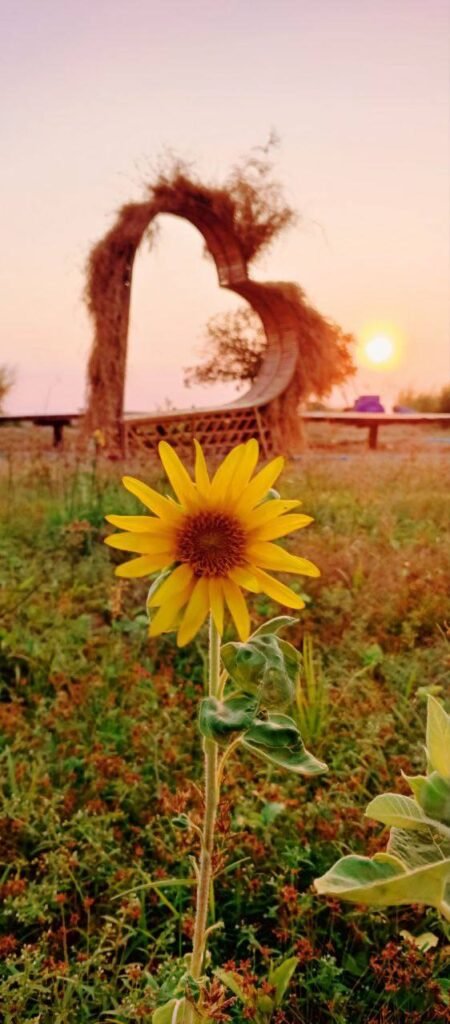
- It frames the sunset perfectly.
- Couples love it (and they tag us constantly).
- The curves look softer than a square frame.
The Real Cost: Breaking Down Our $37.50 Budget
Let me show you the actual shopping list. This is a cheap construction idea that looks expensive.
Steel frame (the skeleton):
- 6 steel bars, 20mm × 20mm in size
- $4.50 each = $27 total
- This was our biggest expense.
Bamboo poles (the body):
- 6 large bamboo poles
- $1 each = $6 total
- Makes the frame look thicker and more natural.
Bamboo branches (the details):
- 3 smaller branches
- Free—we cut them from our own land.
Rope and screws:
- 1 kg black rope = $1.50
- 1 bag bamboo screws = $3
- Total = $4.50
Grand total: $37.50 That’s it. No hidden costs. No fancy materials. Just a DIY bamboo structure that looks like it cost thousands.
How to Build It: Our 3-Day Process
This is a low-cost design idea that actually works. Here’s how we built it step by step.
Day 1: Build the Steel Frame
We started by bending the steel bars into a heart shape. This was harder than it sounds—we had to heat the bars slightly to get smooth curves.
Pro tip: Draw your heart shape on the ground first. Use chalk or rope to mark where the frame will go. This saves you from rebuilding later.
We welded the bars together at key points. If you don’t have a welder, you can use strong wire or metal brackets instead.
Day 2: Add the Bamboo
Once the frame was solid, we tied bamboo poles to it. We used the black rope to wrap around each connection point—tight, but not so tight that the bamboo cracks. The bamboo makes the structure look bigger and more impressive. Without it, you’d just see thin steel bars.
We spaced the poles about 30cm apart. That’s close enough to look full, but far enough that you can still see through it (which is what you want for photos).
Day 3: The “Straw Skin” (The Secret Ingredient)
On the last day, we wrapped the entire structure with dry straw (rice straw or tall grass works best).
Why Straw?
- Golden Hour Magic: As you can see in the photo, the loose straw catches the backlight of the sunset, making the heart look like it’s glowing.
- Soft Texture: It hides the cold steel and bamboo frame, making the structure feel organic.
Functionality: Built for Posing, Not Climbing
We added a reinforced bamboo seat at the base. This was crucial.
Originally, people tried to stand awkwardly in the middle. By adding a bench, we control the pose—guests sit comfortably inside the heart, which frames them perfectly against the sky. It also keeps them from pulling on the straw!
Why This DIY Heart Gate Works So Well
Here’s what surprised me: people think we spent $5,000 on this. They assume we hired professionals.
But that’s the magic of budget garden decoration. When you use natural materials like bamboo and straw, things just look… right. They blend into the environment instead of sticking out. The heart gate also changes with the seasons. In summer, the straw turns golden. In the rainy season, it gets darker. It feels alive.
Tips If You Want to Try This Yourself
If you’re building your own DIY heart gate under $40, here is my advice:
- Location matters. Put your gate somewhere with a clear view behind it—sunset, mountains, or an open field work best.
- Don’t skip the rope. We used 1kg, and it wasn’t enough. Get 2kg if you want extra security.
- Bamboo needs to be dry. Fresh bamboo will crack as it dries. Use bamboo that’s been cut for at least a month.
- The straw will need replacing. Ours lasts about 6 months before it starts looking too weathered. But replacement straw costs maybe $5.
- Get help for the frame. Bending steel bars alone is dangerous. We had 3 people working on it.
Final Thoughts: You Don’t Need Money, Just Effort
I won’t lie—those three days were exhausting. My back hurts. My hands got cut from the rope. But when I saw couples standing inside that heart at sunset, taking photos and laughing, it felt worth it.
This whole project taught me something: how to create an Instagram photo spot on a budget isn’t about spending less. It’s about spending smart.
We used local bamboo. We cut branches from our own land. We worked with what we had instead of ordering expensive materials online. And honestly? I think it looks better because of that.
The best cheap construction ideas aren’t the ones that save money. They’re the ones that make people stop, pull out their phones, and say: “I need a photo here.”
That’s what we built for $37.50.