")
When we started building “Dream Garden,” our biggest problem wasn’t the soil quality or the unpredictable tropical weather. It was the emptiness.
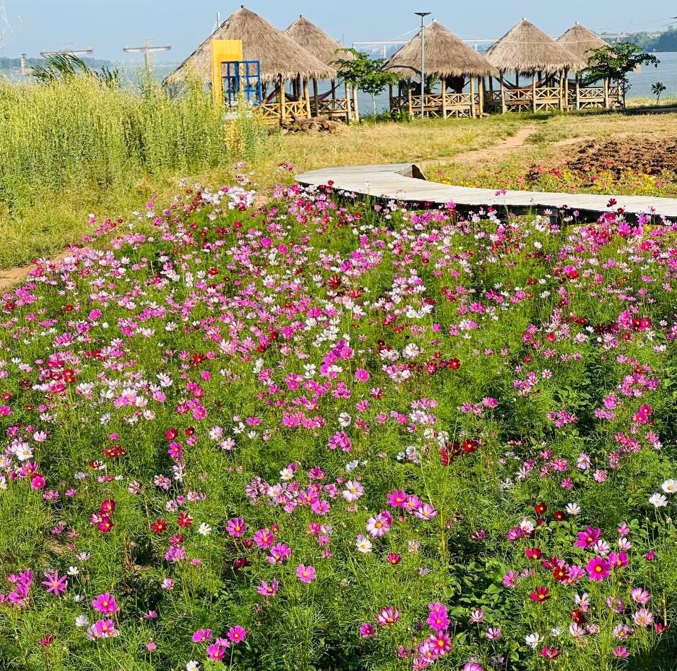
We had this huge, flat space with cosmos flowers starting to bloom, but something felt off. The landscape looked beautiful, but it didn’t have a “heart.” It was just a sea of green and purple with nowhere for the eye to rest. It needed something that would make people stop walking, take a breath, and actually look.
That’s when I decided we needed a focal point. Not just a small garden gnome or a birdbath, but something massive. Something visible from across the field. Something Instagram-worthy that would frame the sky and the flowers.
The catch? Professional garden sculptures of this size cost thousands of dollars. My budget was roughly $35.
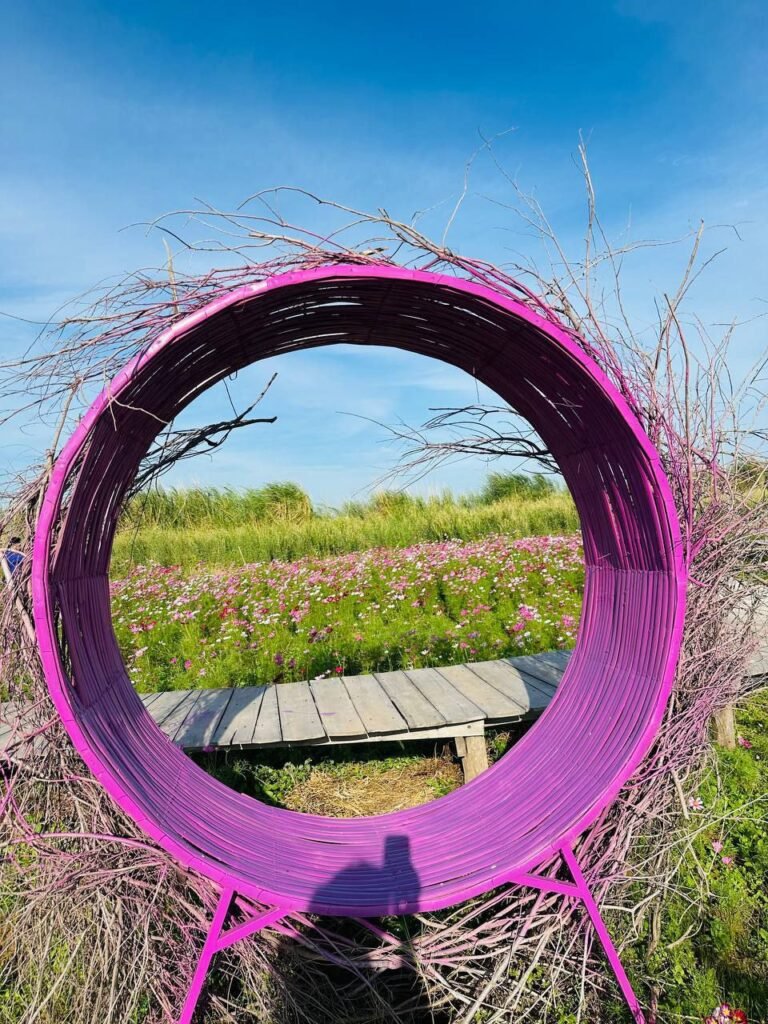
Spoiler: I succeeded. We built “The Portal”—a giant, vibrant pink ring that has become the star of the garden. But wow, did I mess up a lot before I got it right. Here is the story of the struggle, the physics, and exactly how you can build one too.
What Is a Garden Focal Point? (And Why You Need One)
A garden focal point is basically the anchor of your outdoor space. It’s the first thing your eyes are drawn to when you step outside.
Think of interior design: if your garden were a living room, the focal point would be the fireplace or the statement art piece above the sofa. Without it, the room feels cluttered and directionless.
My vision was simple: A giant circular structure standing in the middle of a cosmos field. When visitors walked through it, I wanted them to feel like they were stepping into another world.
The Materials: Keeping Costs Low
The materials I chose were simple. I didn’t have access to high-tech manufacturing, so I used what was available at the local hardware store and in nature.
- Structure: 5 long steel rods (rebar or smooth steel).
- Texture: 3 bamboo poles (about 3 meters each).
- Detailing: Dry branches from a local Rai tree (for that wild, fairy-tale look).
- Fasteners: Wire and screws.
- Finish: 2 cans of bright pink-purple oil paint.
How hard could it be to bend a few metal rods into a circle?
The First Four Days: A Comedy of Errors
I’m not going to sugarcoat this. The first four days were a disaster. If you are planning a DIY project, let this be your validation: it is okay to fail before you succeed.
Day 1: The “Egg” Problem
We tried bending the steel rods by hand, just holding them in the air. They bent, alright—but into weird egg shapes. It looked less like a portal and more like a squashed oval. No matter how much we pushed, gravity kept pulling the top down.
Day 2: The Tree Anchor Failure
We thought, “Let’s use the trees as anchors!” We tried wedging the steel between tree trunks to leverage the curve. That didn’t work either. The rods kept slipping, springing back, and hitting us. We wasted hours getting absolutely nowhere.
Day 3: The Crisis of Confidence
I started questioning my entire life choices. Why was I trying to build a giant ring in the middle of a hot field? Why didn’t I just buy a normal garden ornament?
The problem was physics. When you’re dealing with long steel rods, and you want a perfect geometric curve, you can’t just muscle your way through it. You need leverage, specific anchoring, and patience.
The Breakthrough: Step-by-Step Construction Guide
On day five, we finally cracked the code. If you want to replicate this project, here is the method that actually worked.
Step 1: The Anchored Bend
We stopped trying to bend the rods in the air. Instead, we buried one end of the steel rod deep into the ground to anchor it completely.
With the base stuck fast in the earth, we could use our body weight to pull the top of the rod down gradually. We connected five steel rods together using heavy-duty wire and screws, slowly overlapping them to form one large, continuous circle. It took two people: one to hold the tension, and one to tie the wire.
Step 2: Bulking Up with Bamboo
Once the steel skeleton was up, it looked a bit thin and industrial. It needed a body. We took long bamboo poles and split them into thin, flexible strips.
We wrapped these strips horizontally around the steel frame. This did two things:
- Thickness: It made the ring look substantial, not like a flimsy wire.
- Surface Area: It gave us a wooden surface to screw the decorative branches into later.
Step 3: Adding the “Wild” Texture
This is what makes the structure look magical rather than just “a painted hoop.”
We gathered dry branches from the Rai tree (common here in Southeast Asia). These branches are stiff and twisting.
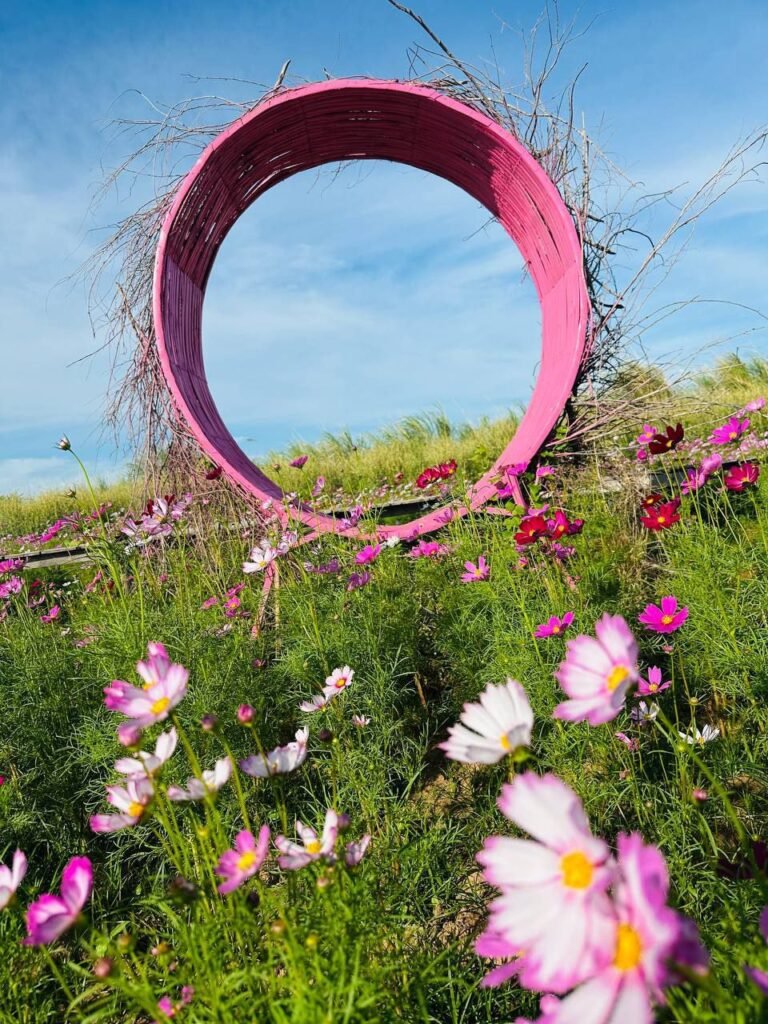
We attached them to the bamboo cladding, letting the ends stick out wildly at different angles. This shattered the perfect silhouette and gave it an organic, “nest-like” appearance that catches the light differently throughout the day.
Step 4: The Color Pop
Finally came the fun part: painting. We didn’t want a natural wood color that would blend into the dry grass. We wanted contrast.
We chose a bright pink-purple (magenta) color. We applied two heavy coats. The paint soaked into the dry wood and bamboo, sealing it against the weather and creating a shocking, beautiful contrast against the green field and blue sky.
Designing the Experience: The “Tunnel Effect”
As we built the first ring, I realized one focal point wasn’t enough for the size of the path. We decided to build a second ring further down the walkway.
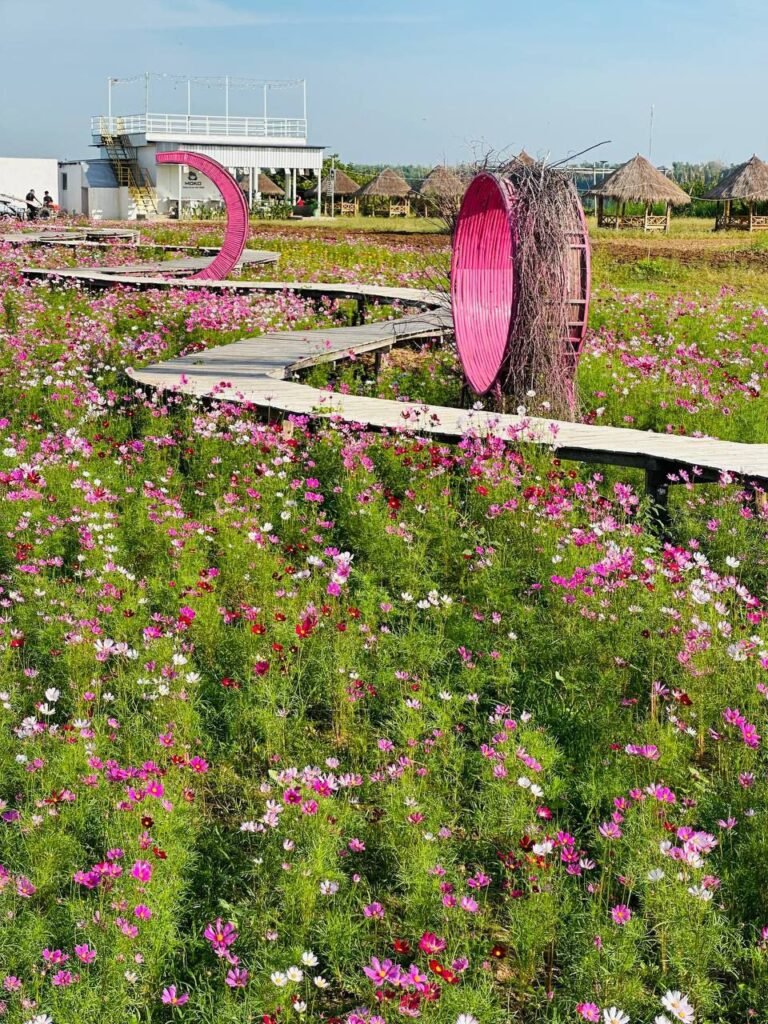
Creating two rings added depth. When you stand at the start of the path, you can look through the first ring and see the second one in the distance. It creates a tunnel effect that pulls you forward.
We also built a rustic wooden walkway that winds through the field in an ‘S’ curve, leading directly through the rings. This is a classic landscape design trick called “Leading Lines.” The path physically guides the visitor’s journey, ensuring they walk exactly where you want them to, right through the portals.
Global Adaptation: How to Build This Outside Southeast Asia
I realized that not everyone has access to Rai trees or cheap bamboo. If you are in the US, UK, or Europe, here is how you can adapt this project:
- Instead of Bamboo: Use flexible PVC pipes or willow branches to wrap the steel core.
- Instead of Rai Branches: Use Birch twigs, grapevine, or Wisteria clippings. Anything that dries hard and has a twisting shape will work.
- Instead of Rebar: You can use heavy-duty irrigation tubing (for a lighter arch) or aluminum flat bar.
The Real Cost Breakdown
People see these structures and assume they cost hundreds of dollars. Here is the actual receipt for one ring:
- 5 steel rods: $22.50
- 3 bamboo poles: $4.00
- Screws and wire: $3.00
- 2 cans of paint: $4.00
- Total: $33.50
Note: These are local Southeast Asian prices. In Western countries, steel may cost more, but you are still saving hundreds (or thousands) compared to buying a pre-made sculpture of this scale.
The Result: A Photographer’s Dream
The change in the garden was immediate. Before the rings, visitors would look at the flowers, take a quick photo, and leave.
Now? They walk straight toward the pink rings. The structure acts as a perfect frame for portraits. Kids love running circles around them. The bright pink contrasts beautifully with the soft purple cosmos flowers. From certain angles, the rings look like they are floating in mid-air.
It became exactly what I hoped for: a destination, not just scenery.
Final Thoughts: Don’t Be Scared to Build Big
If your garden feels boring, don’t just plant more small flowers. Go big. Build one massive statement piece.
You don’t need fancy tools or a contractor’s license. You just need a clear vision, some basic materials, and the willingness to look foolish for a few days while you figure out the physics.
Would I do it again? Absolutely. Even with the “egg-shaped” failures on Day 1, the result was worth every second of frustration.